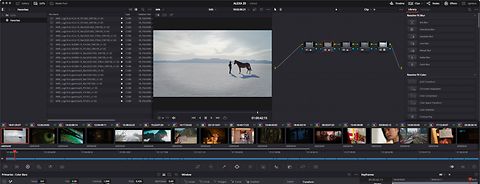
A screenshot of Blackmagic's Resolve grading application with a timeline showing ALEXA 35 clips

Conforming Process

Check your delivery before you shoot!

Before shooting commences, every production must conduct a postproduction meeting with all those involved in the workflow in order to define the final target format and avoid problems during the postproduction process. The key question in those meetings is what are the delivery formats needed vs. the vision of dicector of photograhy/director:

There are many delivery formats with different aspect ratios and resolutions these need to alighn with the creative framing intent. Some well-known delivery formats include:

•    HD 1.78:1 1920x1080
•    UHD 1.78:1 3840x2160
•    HD 2.00:1 1920x960
•    UHD 2.00:1 3840x1920
•    DCI 2.39:1 (Scope) in 2K 2048x858 or 4K 4096x1716
•    DCI 1.85:1 (Flat) in 2K 1998x1080 or 4K 3996x2160

Get everybody "on the same frame"

It is good practice to get in touch with the production team and DP to confirm the correct framing before starting postproduction work. It’s also helpful to shoot a so-called frame leader and forward it to the post facility to ensure correct aspect ratio and framing during the final color correction and finishing/mastering.

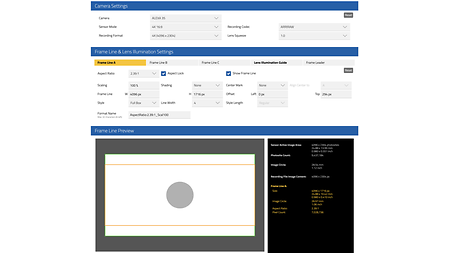
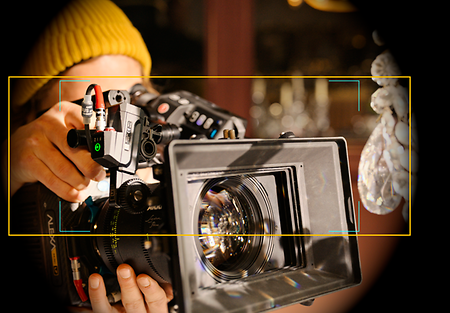
For example, shooting for a final delivery in Scope (2.39:1), it is necessary to frame correctly with the camera on set. The frame lines function in the camera can help with this. For more information regarding frame lines, please visit our Frame Line and Lens Illumination Tool, where you can create and download frame lines for all ARRI cameras.


Mix and match - step-by-step framing for the same target

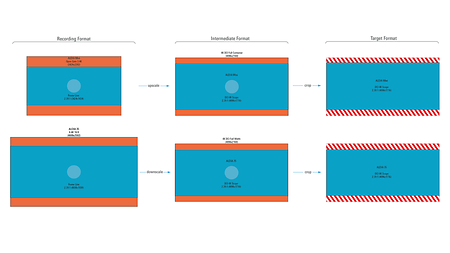
In the following example you will find a combination of ALEXA Mini and ALEXA 35. The ALEXA Mini captured ARRIRAW Open Gate 3.4K and the framing was intended for 2.39:1 (Scope). The ALEXA 35 captured ARRIRAW 4.6K 16:9 and the framing is intended for 2.39:1 (Scope).

In our example, the final target format is set to DCI 4K 2.39:1 (Scope) 4096x1716. In this case each source must be resized to full width, which means 4096 pixels. The final height is defined by the final aspect ratio, which is 2.39:1. All intermediate steps, as shown below, are carried out in the background by most postproduction and grading tools, unnoticed by the user. For a better understanding, have a look at the following image:

Online or Offline?

When talking about the final postproduction process, two different terms are used, though they mean the same thing. Some people call it conforming, and others call it online.

Conforming or online simply means relinking back to the high-res OCN (original camera negative) files in the correct order, as defined by the editor within the editing software (e.g. Adobe Premiere, Avid Media Composer, or Final Cut). There are various postproduction tools on the market which all have pros and cons for different use cases. It’s always up to the user or post company to find the postproduction software that best suits the project. Some well-known tools include:

  • Blackmagic DaVinci Resolve Studio
  • FilmLight Baselight
  • SGO Mistika
  • Autodesk Flame
  • Digital Vision Nucoda

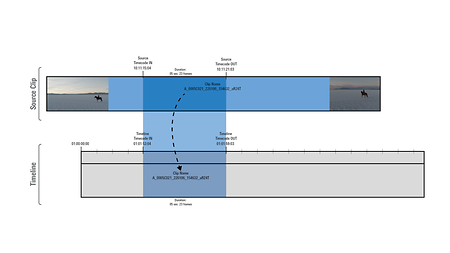
For relinking back to the high-res OCN files you always need some basic information to generate your final timeline in the finalization tool:

  • Clip name or reel name
  • Timeline timecode IN & OUT
  • Source timecode IN & OUT

First, the clip or reel name identifies the relevant clip. The timeline timecode defines the target location where each clip is placed in the timeline. And finally the source timecode, which is included in every source clip, identifies the used part of the source clip, defined by the IN and OUT timecode.

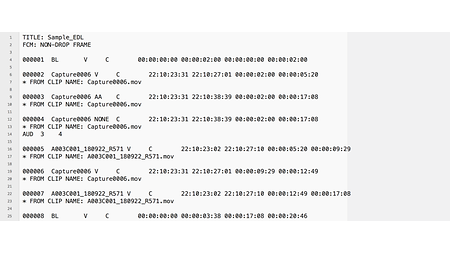
The EDL

To export this information from the corresponding editing tool, there are various possibilities. In the early years of postproduction, the EDL (edit decision list) was widely used to transport the edited order from the editor to postproduction. The EDL is a human readable file (ASCII text), which can be opened with every text editor. The big disadvantage of EDL was the missing support for most effects e.g. repositioning clips (pan & scan or zooms). Another problem was a limitation in the character length of the source clip reel names in some cases and the different types of EDLs (CMX 340, CMX 3600, GVG, Sony 9100, etc.). So, it was almost impossible to find a standard which all tools understood.

The character-length problem was overcome by extending the maximum character length to 32 characters, but there was still no possibility for transporting effects within an EDL.

AAF and XML – the "new EDLs"

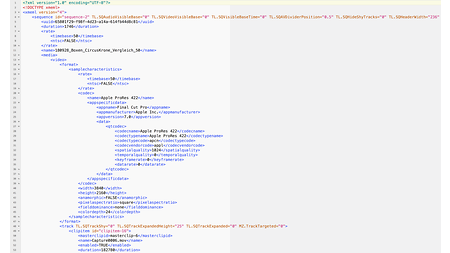
Recent years have seen big improvements to supporting dissolves, some (not all) effects, and of course zooms and pan & scan, by using AAF (advanced authoring format) or XML format. Compared to XML, the AAF format is not human readable and it’s not possible to open an AAF in a text editor. So, you cannot edit an AAF file.

All professional editing tools can export AAF, XML, or EDL files; some can even export all three. After exporting the AAF/XML/EDL file, you can import it to your grading tool of choice. You will find more information about this procedure in the manual of your grading/mastering tool. When loading the AAF/XML/EDL, it is possible to relink to your high-res OCN. If the source timecode and clip or reel name in the AAF/XML/EDL file match the high-res OCN files, there should be no problem in relinking the files.

Rebuilding the whole movie in your finishing system is a technical job and must be executed with caution to avoid time-consuming errors or problems. A sensible double check is to test an offline reference export from the editing room. If necessary, you can fix things (effects, repositions, etc.) that wouldn't make it in the conforming process. For other issues that are independent of the conforming itself, such as color processing or visual effect shots, we refer you to our Color FAQ.

To ensure a smooth conform, we suggest to test the whole postproduction pipeline from set to post – from beginning to end: on-set, dailies, editing, conforming, and finishing.